Showing posts with label Made it Myself Monday. Show all posts

Oct 18, 2011

Halloween Layout

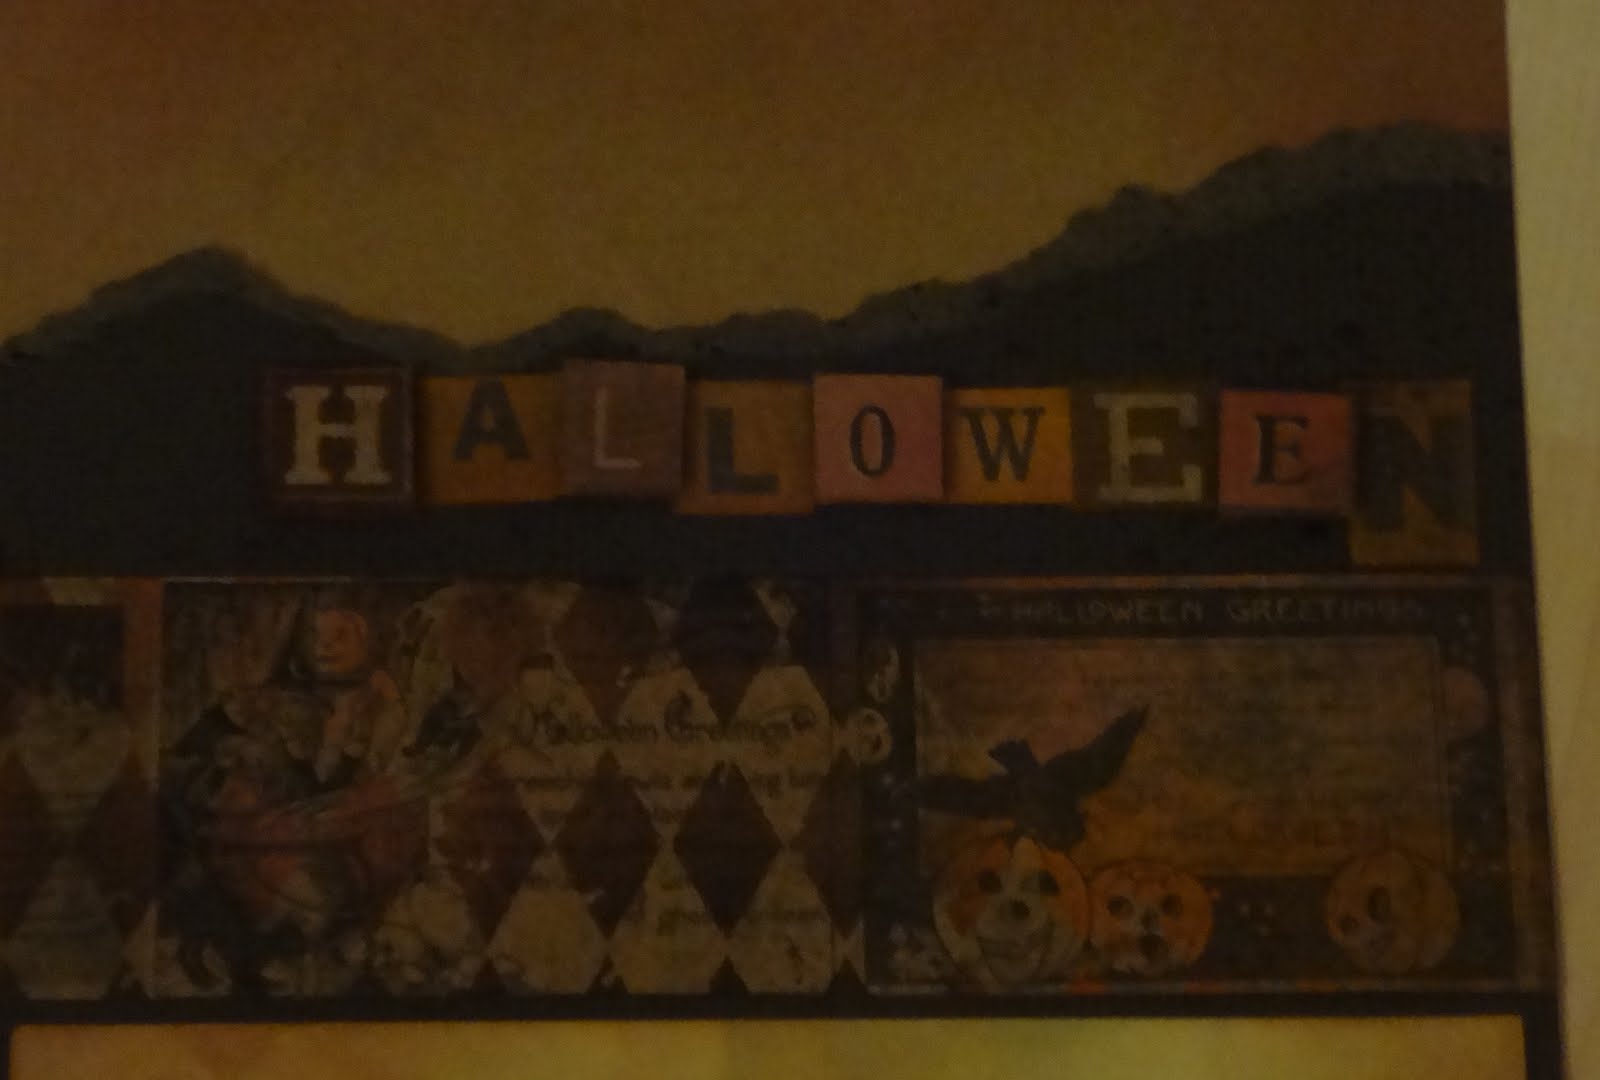
Michaels has been getting a lot of Tim Holtz halloweeny scrap stuff in lately and I'm loving it!  I am teaching a Halloween class and made this layout using his halloween paper pack.  His papers are soooo cool!  Ordinarily I would walk right by this brown pad and not give it a second glance but because it was recommended for this class, I had to indulge.  It has embossing detail all over it and when you use his inks, it turns out so neat.


So the paper is a thick, kraft color.  I used a white gel pen to highlight some of the skeleton's bones ...
 then I flipped one of the pages to use the back for the facing page.  I cut out some of the letters in one of the collage pages and popped every other one to give it dimension.  I only used two inks on this whole spread!  They way they blend together it gives it such an eerie look!  I also used his Goosebump spray for the dots on the solid brown, torn background.  I used Martha's iron fence punch to create the border on the bottom of the dark brown.

Check out this paper pack when you get the chance!  You will be amazed at what you don't see!!!  Just like ghosts hiding! 

Jul 8, 2011

Because I Give a Hoot

Bff's was having a grad party for her daughter so I wanted to make her a card.  Although we are in the midst of the homeliest card contest (rules below) I decided to make her a real card using some real stuff.  I used the owl punch from Stampin Up and some random cardstock from my stash, probably Bazzill because that's pretty much all I use.  Her high school colors were red and black but nooo she wanted her party to be her college college of purple and gold.  Took a few minutes and waited til the last possible minute but turned out cute ...


added this to the inside cover ...


Thanks to Terry over at Going Over the Edge for inspiration!


Here's the deal on the homeliest card contest ... between my bff and I we have tons of scrap stuff but not tons of time to play.  Well, for her daughter's birthday card (the one I made the rooster card for) she ran out of time and drew a stick figure on a piece of white cardstock.  I retaliated by sending a torn piece of notebook paper with something scribbled on ... and so it begins ... here are the rules:
1.  run out of time to make a proper card
2.  stare at all of your stash but use none of it
3.  double score for being late
4.  mis-spell the recipients name
5.  don't put enough postage on it so they'll really have to pay for it!

It's just something silly we do to amuse ourselves.  We don't have enough play dates to get together so we have to make up little games!  

Partying with:

Jul 3, 2011

Happy 4th of July!!

Yeah!  I finally did it!  I made something!!  Here's the story!  I posted a few months ago about a to-do from the Family Fun mag ...


Loved it so I picked up a remnant from Jo's a few weeks ago ... when I got it home it was too small so I picked up another few yards last week.  I tied then I dyed and I dried then I realized it was the wrong one!  what a bummer but I made it work anyway ... 

drying ....


all bunted up on the front porch ...


Happy 4th!!!


May 23, 2011

Something Sweet for Someone Sweet

I'm at the age (apparently) that some friends are becoming grandparents.  I'm not going to jinx myself by saying anything because I'm perfectly fine with the grand puppy and grand kitty I have now.  I'll enjoy my friends'  until that happens.  I made the card and photo frame for a Christening gift for one of my friends new grand baby.  For some reason, whenever they snap a shot of her she is flipping 'the bird', thus the JBird banner.  I found the frame that was in layers and worked with it!  It was a lot of fun and really enjoyed making  it for them.  Enjoy!


The card was made using the Paper Doll Dress Up cart.  I used my Gypsy to flip it and weld it together.  I used Bazzill's dotted swiss (my last sheet, bummer but worth it), it's hard to tell in the photo but it makes the dress look so sweet.  Just added a layer of velum that has sparkles, again hard to see and a satin ribbon.  The frame had multiple layers which I really enjoyed working with!  The bird was cut from the Give a Hoot cart and sandwiched in between the top two layers of glass.  The banner was from the Birthday Bash cart and layered as well.  The photo frame was from the ol' Accent Essentials and placed on the bottom layer of the frame.  The paper is from My Mind's Eye collection.  


linked to ...


May 16, 2011

Envelope Pillows

Finally some sunny days here in MD!  I managed to fit in a trip to this awesome flower farm in PA where they have rows and rows of green houses!  Love it!  Took the folks, Poppy didn't make it back in time for his favorite British comedy show but he's seen them all a dozen times I'm sure.  I was able to plant them all in my little patch and still had some time left.  Earlier in the week I made a quick stop at Joann's and picked up some fabric for pillows on the front porch.  I like to keep it cute but my husband swears one morning he's going to find a hobo on the bench because it looks so comfy.  I'll take that as a compliment!  Tossed out my pillows from last year so had to make new ones.  Jo's had the pillows on sale last week, and I knew I had one in the dungeon that I was saving for the perfect occasion.  After planting, I had a few minutes before the bus came so I whipped up these super easy, super cute pillows to comfy up the porch.  My method is called the "Fold it over and hope it fits" but I think the official term is 'envelope cover'.  I used less than a yard of fab to cover both pillows, about 18" squares.  Should've taken pics of the process but found a better tutorial at A Pretty Cool Life.  Here's my finished product: